
Before I forget, I want to remind you that I'm having a sale on my Halloween Math Lab from tomorrow (the 22nd) to the 25th. Grab it now for 10% off! This is a really fun project for Halloween, but it is also meaningful and has real-life implications. It's differentiated and Common Core aligned. All you need to do is copy and you're done!

OK... now onto my post!! I've been crafting a bit in my room this week. Sometimes when I really need to re-fuel, I find crafting to be really therapeutic and relaxing. I especially love to craft if I can find some sort of use for my craft!
In our school, we have little windows on our doors, and we have to cover the windows in the event of a lock-down. A lot of people just tape some rolled-up butcher paper onto the top of the window and roll it down during a drill. That wasn't working too well for me. I'd end up having to grab tape and make it stay un-rolled when I needed to be with my students. If I'm being honest, I think the butcher paper was just... ugly! So I created a little curtain for my classroom window. Recently a colleague asked me to make her one, so I took pictures of the process so you guys would know how to do this! It's SUPER easy. All you need is:
1. a sewing machine
2. a cute fabric (you can get this really inexpensively in the clearance section at Jo-Ann's Fabrics)
3. thread
4. glad hooks
5. a dowel
6. a measuring tool
So first, find a fabric that you like. Measure and cut the fabric for the length and width of your window. You will need double the width so that your curtain bunches. You can get away with a little less than twice the width, but don't go less than one and a half times the width. You will also need to add an inch of space for the bottom hem, 2 or 3 inches for the top hem depending on how much curtain you want above your rod, and 2 inches for the pocket for the actual curtain rod. So, if your window is 12 inches wide x 20 inches long, for example, you'd want to cut a piece of fabric 24 inches wide x 25 or 26 inches long. Here's me measuring my fabric!

Then, fold your fabric in half width-wise, but fold it so that you can see the back of your fabric, like I did below. It's really important that you make sure it's inside-out! It makes all of your seams look better later.

Now below, you can see that I sewed between a half an inch and an inch from the edge of the fabric. I sewed both halves together on the long side. Then I sewed ONE of the short sides. Here's the long side...

And here you can see the short side (on the bottom) is also sewn! So of course, the right side is sewn, but the left side on here is not sewn because we folded our fabric over already. Remember?

Now it's time to turn the fabric-tube you've created right-side-out again. Here's my dog Ruffles modeling our almost-curtain! He's a handsome little fellow. Plus, he makes my curtain look better...

Thanks, Ruffles! Ok, now you're going to deal with the one side that hasn't been sewn. First, fold over the top about half an inch. You might want to pin it, but if you're a little bit lazy like me, you will probably just fold and crease it and sew it as is, adjusting as necessary.

Yay! Now we have progressed from fabric-tube to almost-curtain! See?

Ok, so now you're going to have to do some measuring again. Remember, you planned for 4 or 5 extra inches to be used on top before for the top hem and curtain rod pocket. Even though I'm lazy, I definitely pinned this one so it wouldn't move mid-sew. Nobody wants a crooked curtain!

Ok, so I folded my curtain over 2.5 inches or so, and then I sewed right over the seam I sewed previously. Here are the pins. You can already see exactly where I sewed after this picture was taken.

Okay, so now I have a big hoop sewn on the top of my curtain. You could absolutely leave your curtain like this if you don't care about having some fabric on top of your rod pocket. Plenty of people do this, and that's fine! I like having some fabric on top of the dowel rod though.

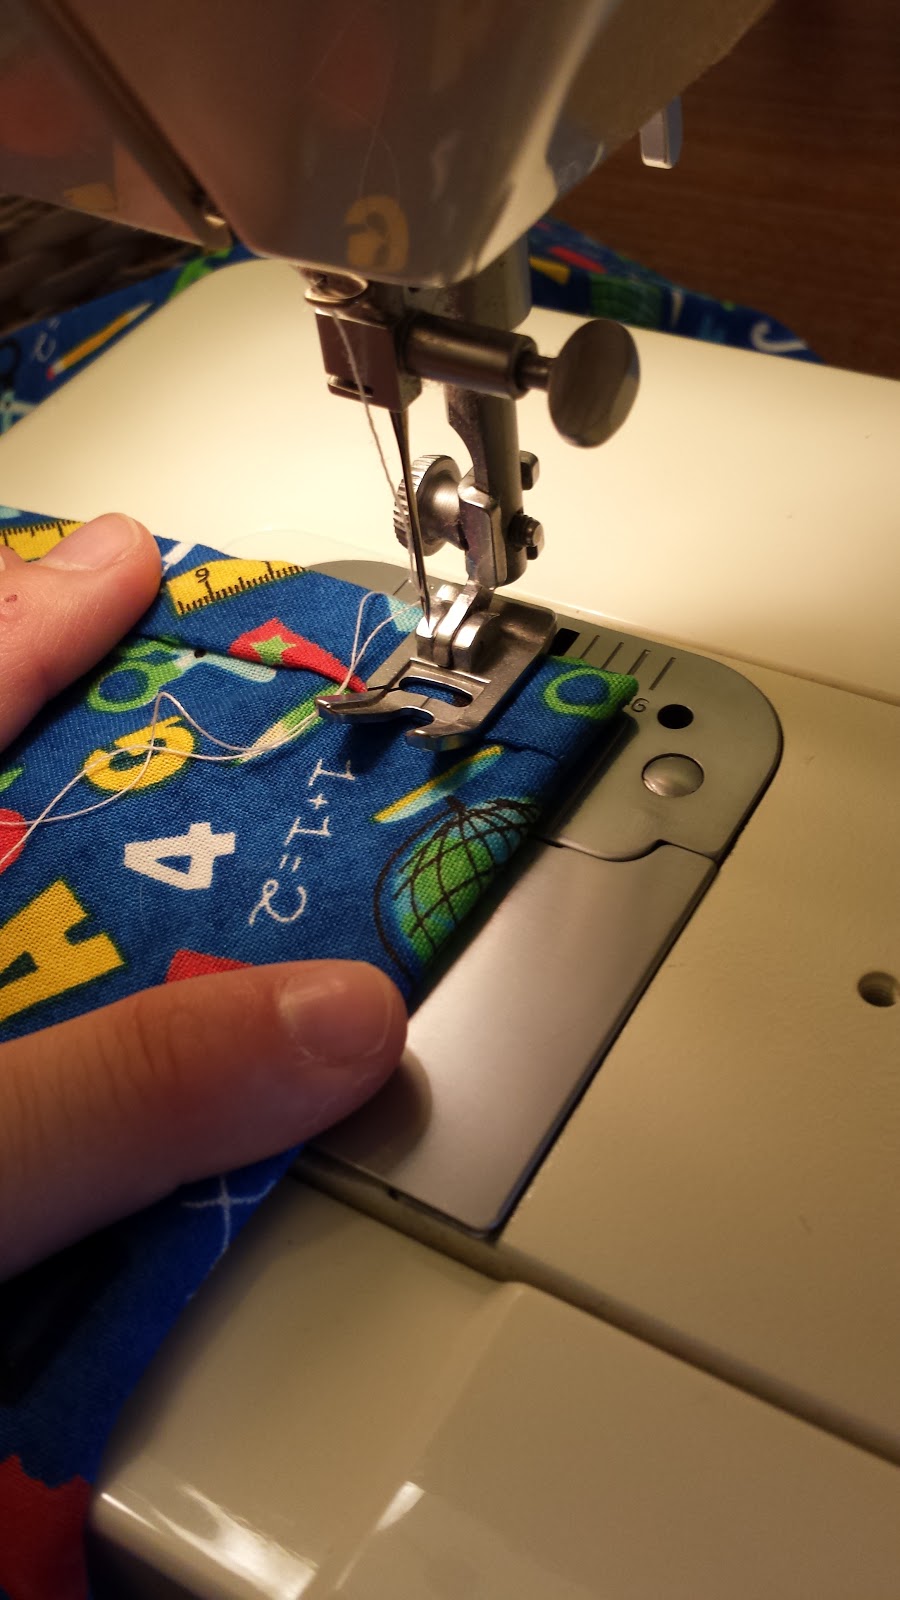
Now, I'm sewing one additional seam in my curtain. The space between the two seams will be where the curtain rod goes! I use the lines on the side of my sewing machine to guide me so I don't have to measure.
And then you're done! Yippie!!! Mr. Word On Third was kind enough to model this curtain for you. His fingers are acting as the curtain rod.

And that's how to make a curtain! I make a couple of them for the holidays and seasons to decorate my classroom. Here's my current Halloween curtain!

As you can see, I used glad hooks to stick my curtain rod, and I just use yarn to bunch the curtain together (unless we're in a lock-down drill, in which case the yarn would come off). My secret tip for getting the rod to stop sliding off of the glad hooks is to put pencil erasers on the sides of the rod.
So... that's how to make a curtain! What are some things you have made for your classroom? Are you set up for Halloween??? For our class party, we are painting pumpkins at our class party, and I have my students decorate paper skeletons with funny costumes. Then they have a costume contest. For our snack, we eat Halloween cereal!

Remember those from back in the day?! I had no idea they were still around until another teacher told me she served this during her class parties. It is SO easy, but so much fun! I'm sure this stuff is full of sugar, but it's nowhere near as sugar-filled as Halloween candy.
Comment below and share what you like to craft in your classroom! What are you doing for Halloween this year??
No comments
Post a Comment